How to add Bottom Navigation in Your MageNative Mobile App
MageNative’s Bottom Navigation provides easy access to your app’s main sections. Here is a step-by-step guide to set up Bottom Navigation in your MageNative mobile app:
- Log into your MageNative admin panel and click on App Studio in the left panel.
- Select Navigation Settings on the menu to start your configuration. A navigation setting dashboard like this will appear on the screen:

- Select the Bottom Navigation Tab in the Navigation Settings.
- You can add up to 5 bottom menu items. One menu by default will be used for redirection to the Home page and is not optional.
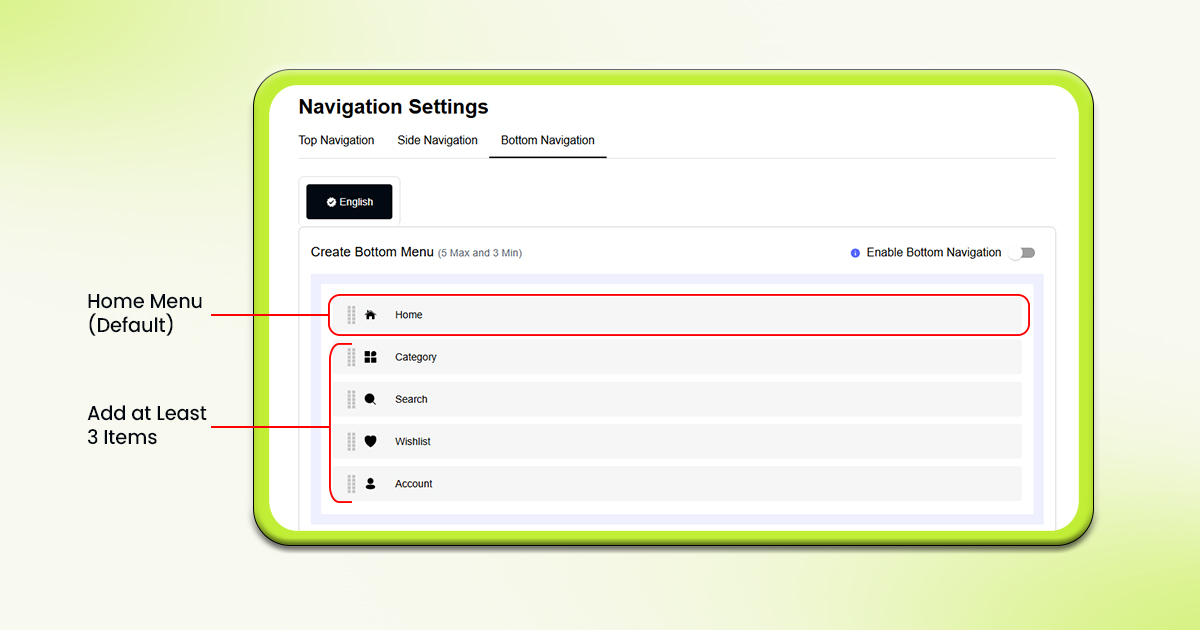

- Add at least 3 items for a bottom menu.
- You can show/hide menu items as needed.
- Click on the edit icon next to the menu items to start configuring them.
- For each menu item, you can set the title, and link it to the desired page or section (e.g., collection, web URL, native page).
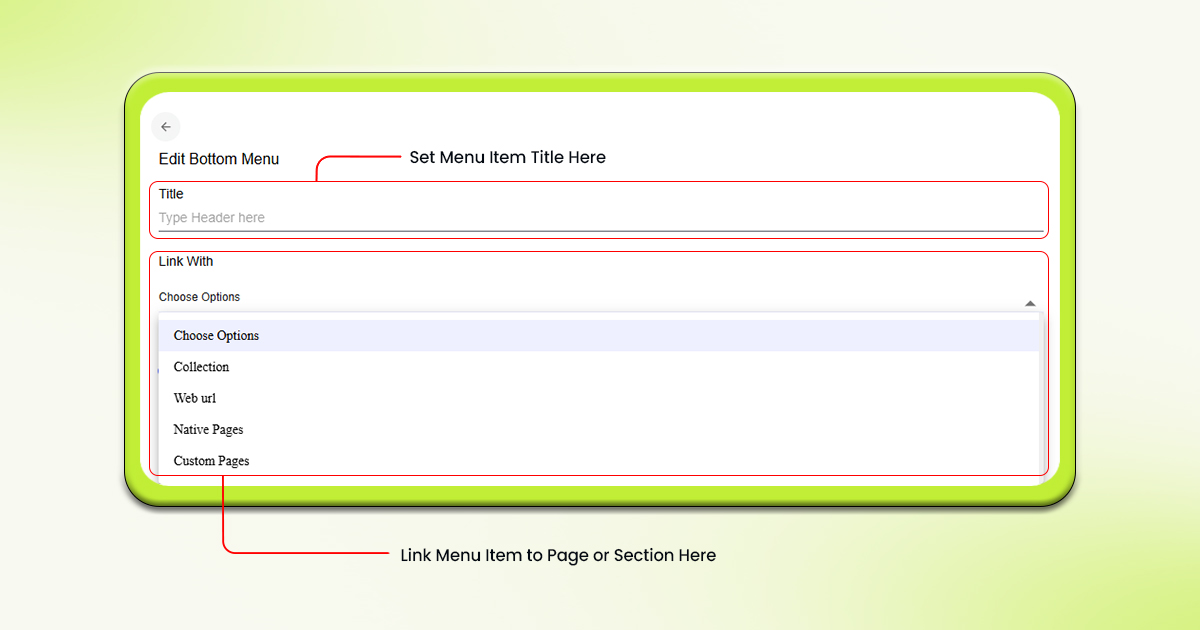
- Further, upload any custom icon or choose an icon from the icon library for each menu item.
- In case you are choosing from the icon library, you can select among different options like – filled, outlined or all.
- In the “Menu Settings” section you can select the icon color, text color & background color.
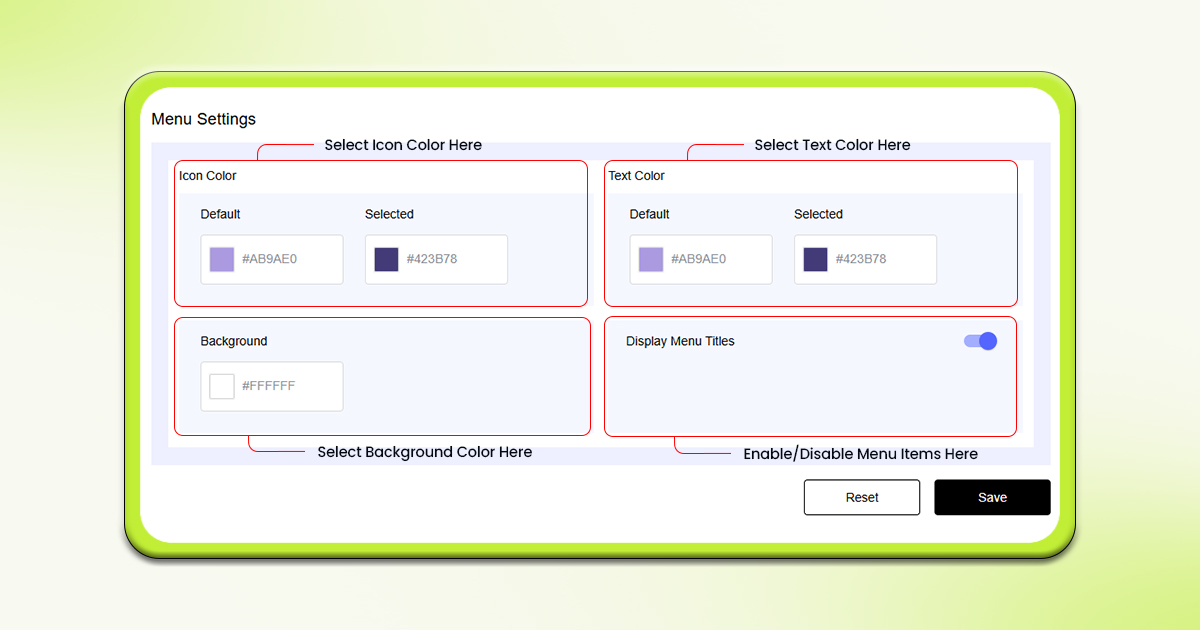
- Moreover, you can enable or disable the menu item items depending on whether you want it to be displayed or not.
- Click on the Save button to apply the changes.
Feel free to reach out to our support team if you have questions or need support. We are here to help and address any issues you may have!


