How To Provide Access for Firebase, Google and Apple Developer Accounts
1.Create a Firebase Project and Add member
Create a Firebase Project And Add Member
A Firebase project linked to your mobile app will be required for certain features such as App Analytics, Push Notifications, etc., to work. This guide will help you create a Firebase project and add a member to it.
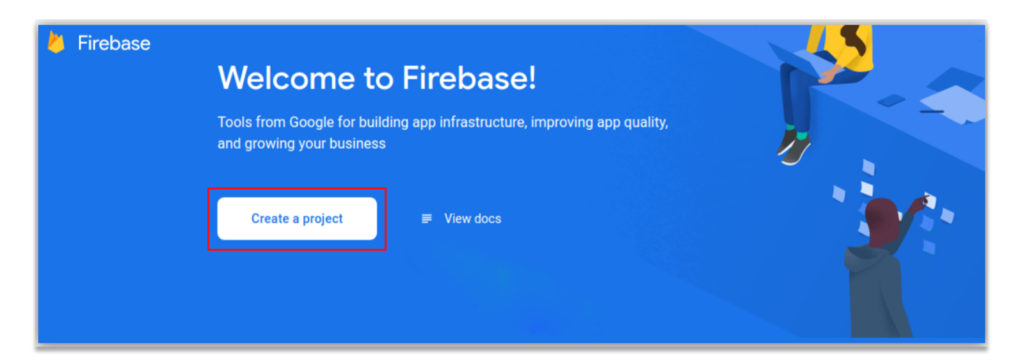
- Go to https://console.firebase.google.com
- Create or Sign in with your existing google account
- Click on ‘Create a project’
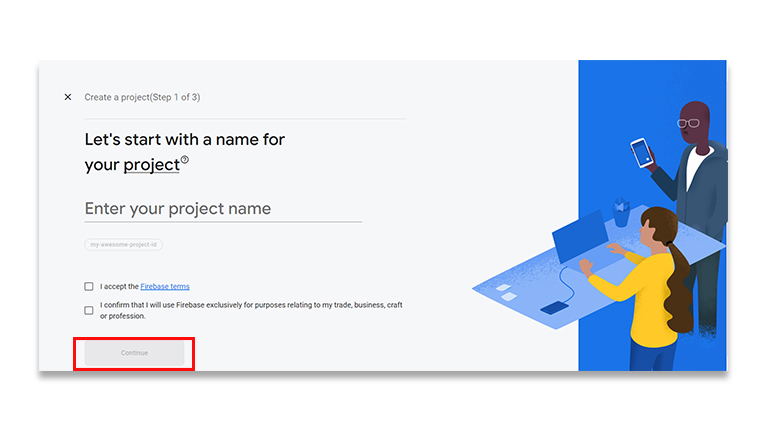
Create a project (Step 1 of 3)
1- Enter Project Name(Your Store or App Name), accept the Firebase terms, and click Continue.
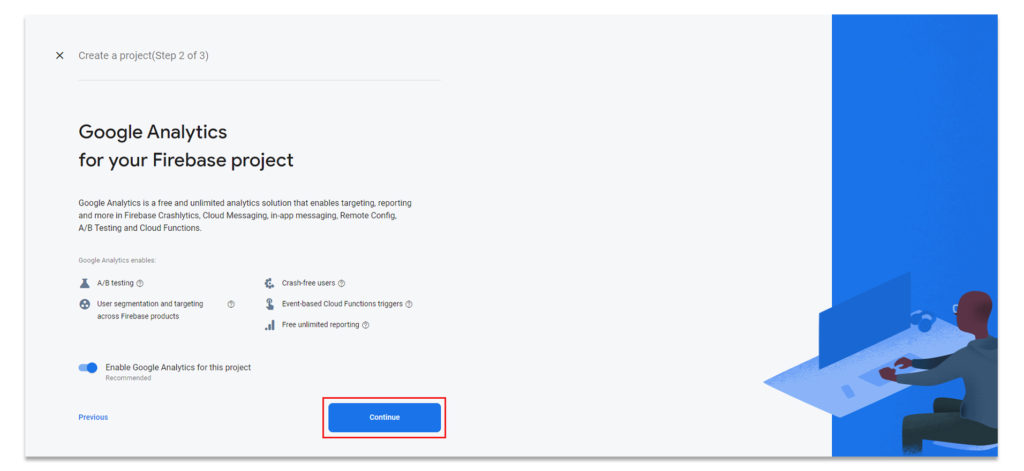
2- Click Continue again
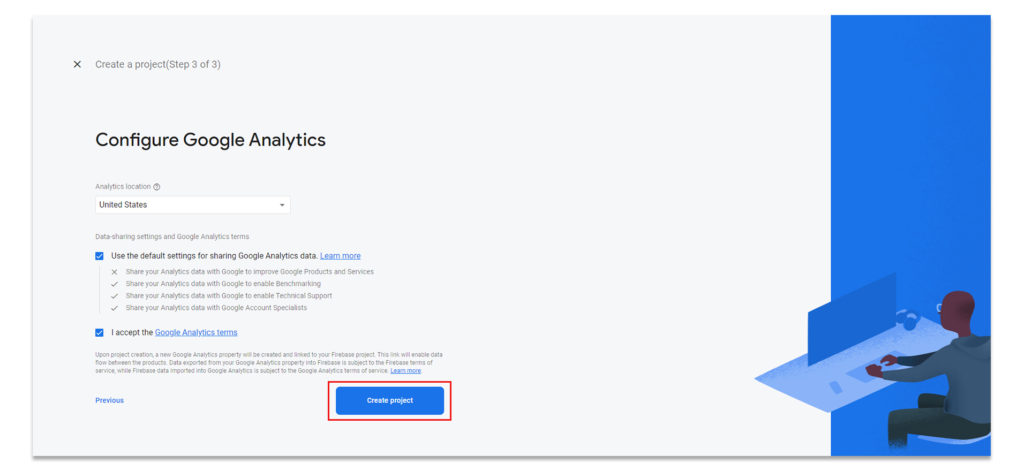
3- Select your Country, accept the Terms and conditions, and click Create project.
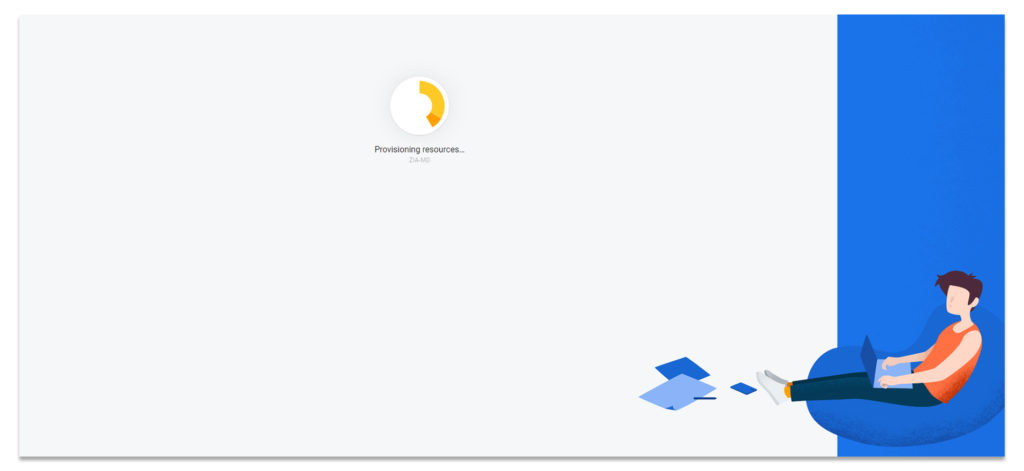
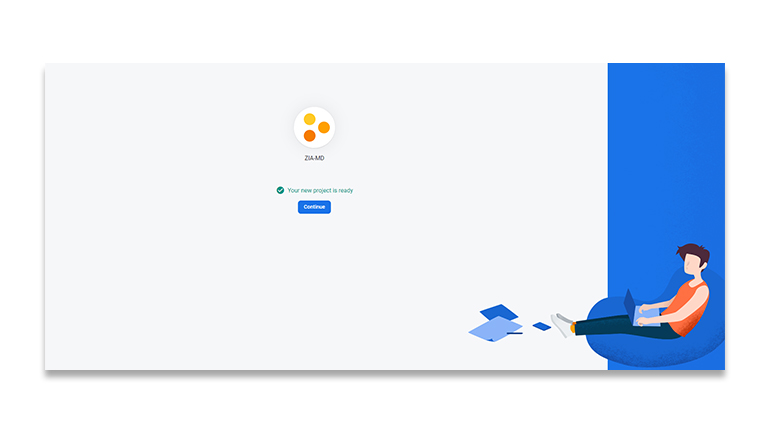
4- Wait for the project to be created and then click Continue
Add a member to your Project
1- Click the Settings ![]() icon, then select Users and permission
icon, then select Users and permission
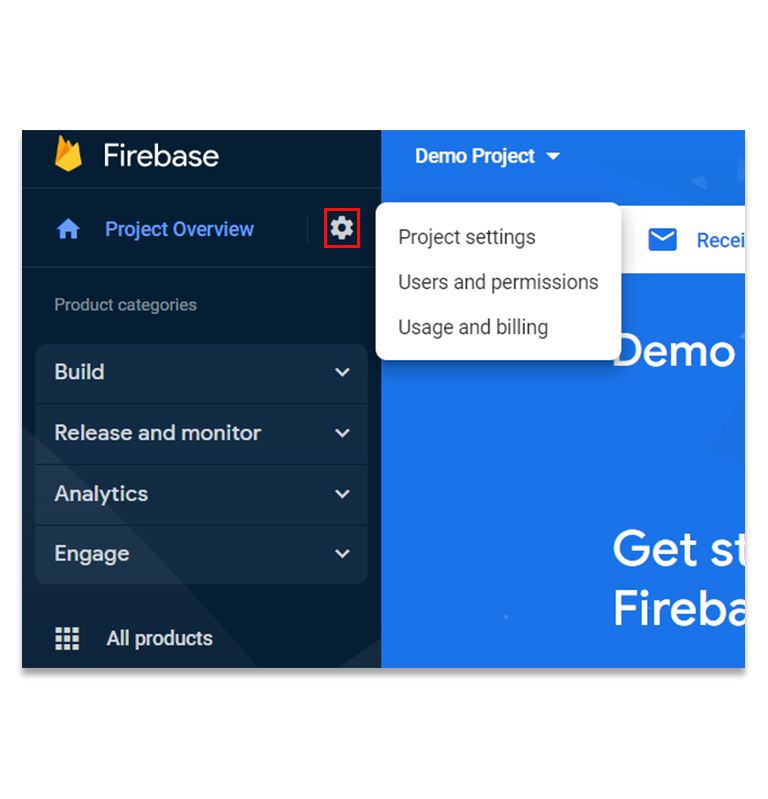
2- On the Users and permissions page, click Add member.
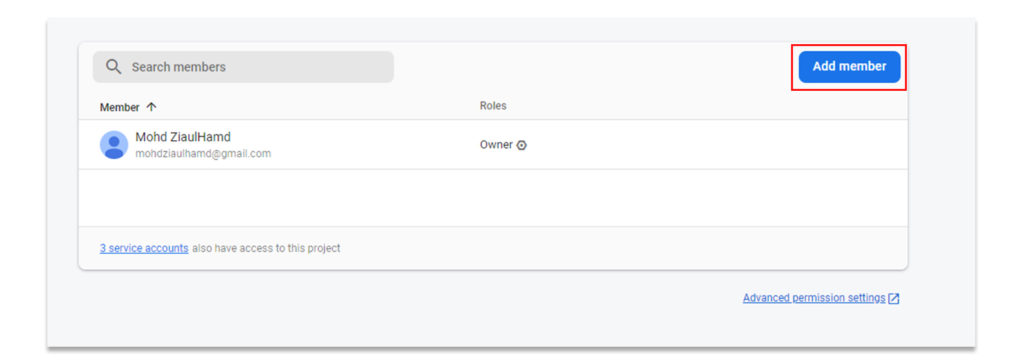
3- Enter email magenativedeveloper@gmail.com and select the role as Owner.
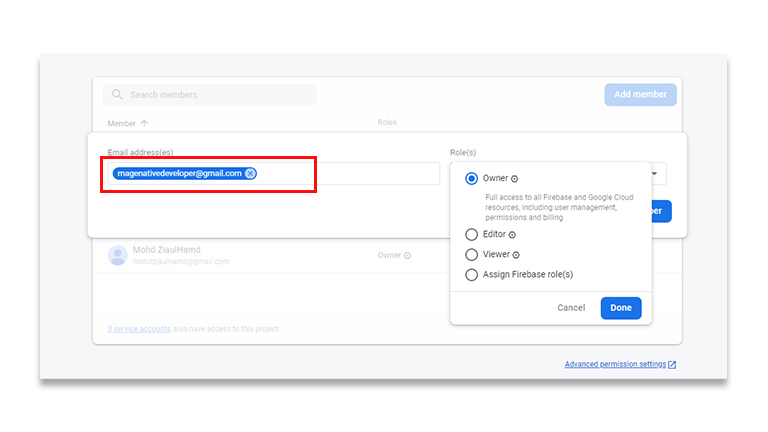
4- Click Add Member and the invitation will be sent.
That’s it! Your Firebase account is created. Go-Ahead and publish your app.
2.Granting Access for Google
In order to upload your Android app on the Play Store, we require an invite to your google developer account. If you are not yet enrolled please follow this guide first. Once enrolled please follow the steps below:
Here are the steps to give admin access to your Google Developer account:
- Login to your Google Developer account with your Google ID and password
- Click on Users and permissions
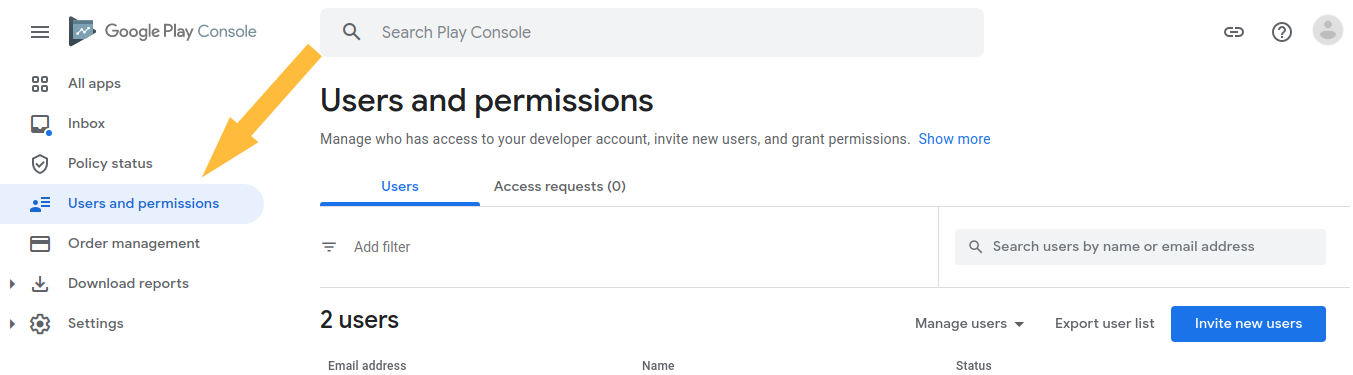
- Click on Invite new users
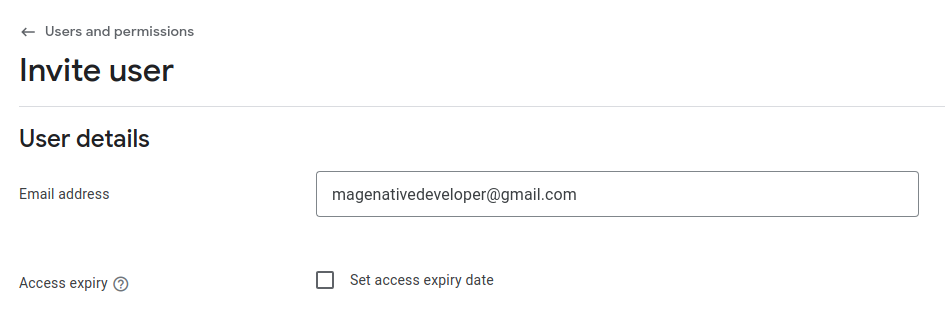
- Add Email address ‘magenativedeveloper@gmail.com’ and leave the Access Expiry field Blank
- Now click on Account permissions at the bottom
- Select the Admin(all permissions) option
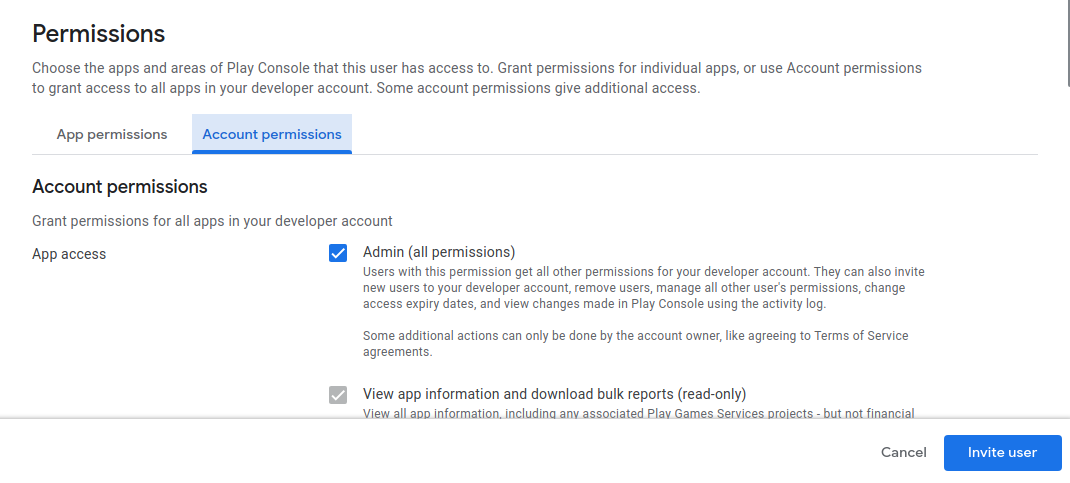
- Click Invite user.
Once done, our team will check the invite and proceed accordingly.
3.Granting Access for Apple
In order to upload your iOS app on the App Store, we require an invite to your Apple developer account. If you are not yet enrolled please follow this guide first. Once enrolled please follow the steps below:
Here are the steps to give admin access to your Apple Developer account:
Apple provides 2 types of developer accounts:
- Individuals or sole proprietors/single person businesses.
- Organizations.
Individual accounts do not allow for member invites. Therefore for publishing your app on the App Store please follow any of the below methods:
- Share your Apple developer account credentials privately, we will upload the app and you can change the password afterward
- Login remotely in our systems to get us specific access to your iCloud as an authorized member
- Change the account type and enroll for Organisation type by contacting Apple. It would be much easier to control and the submission time will be significantly reduced.
Otherwise, if you have an Organizations type account, please follow the steps below to give the admin access to your Apple developer account:
- Login to Itunes Connect with your Apple ID and password
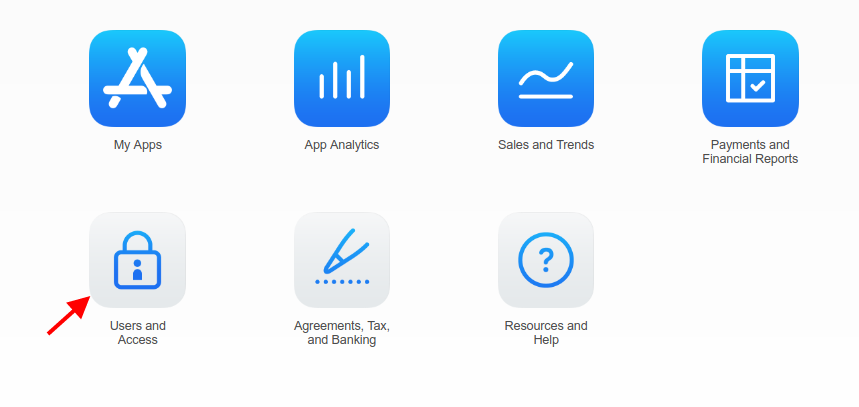
- Click on “Users and Roles“
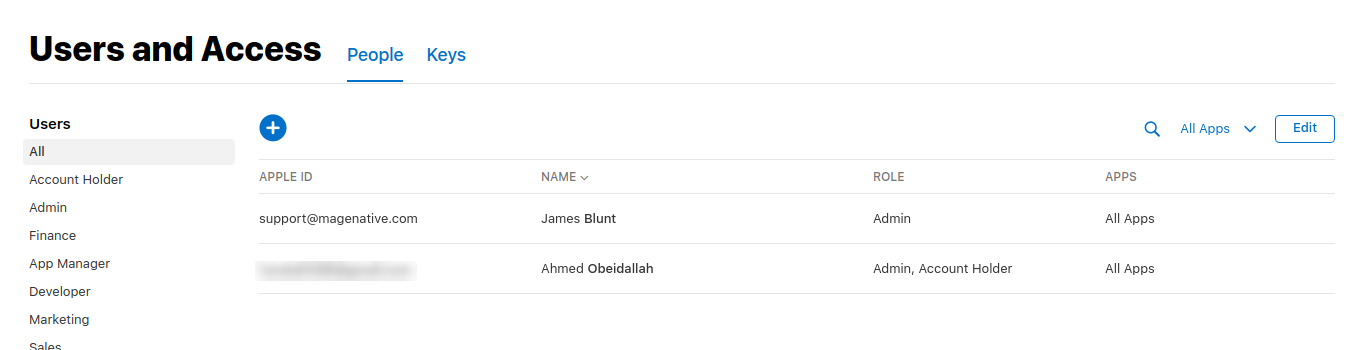
- Click on the “+” sign next to Users
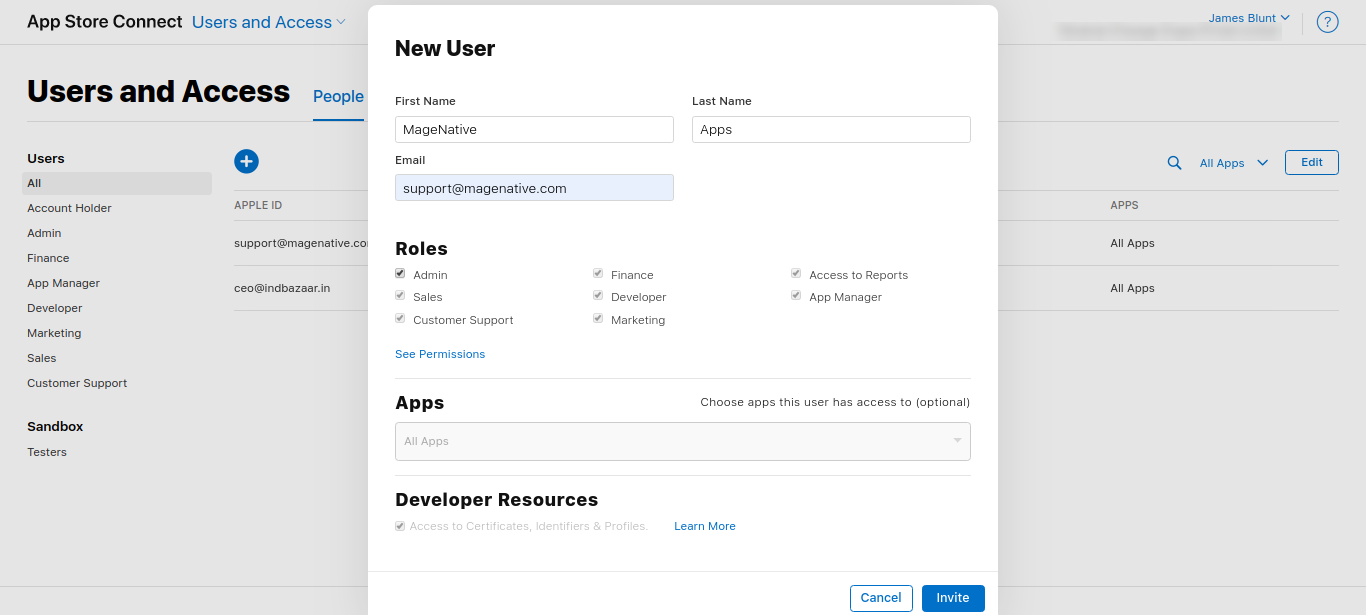
- Enter the First name as “MageNative”
- Enter the Last name as “Apps”
- Enter the email address as support@magenative.com
- Select the role to assign: “Admin”
- Click Invite
Once done, our team will check the invite and proceed accordingly.
4.Granting Access for Facebook Login
Create a Facebook App and Add member
A Facebook App linked to your mobile apps will be required for adding the Facebook login to your mobile apps. Your customers will be able to log in using their Facebook accounts with just a tap. This guide will help you with creating a Firebase project and adding a member to it.
- Go to https://developers.facebook.com/
- Log in to your Facebook account
- Click on My Apps
- Click on Create App
- Choose the app type Business and click Next
- Fill your App Name or the Store Name in the Display name field
- Enter your email in the App contact email
- Click on Create app
- Now click on Roles and then click on Add Administrators
- Type in “mymagenativellc” and click on the Submit button.

Congrats! We have been successfully added to your Facebook App.


