Setting Up Google Analytics For Shopify Mobile Apps

1.Setting Up Google Analytics For Shopify Mobile Apps
Did you know?
According to Statista, about 69.4% of web users utilize eCommerce applications for shopping.
Having a robust mobile application lets you gain a majority of shoppers floating on the web. Yet simply having a mobile app won’t give you overnight success. You need to craft a strong marketing strategy to captivate your visitors. And crafting an efficient strategy needs thorough planning, which could be acquired with analytics.
App analytics provides you with information about what your users want and need. Many apps appear to be losing users as a result of their failure to listen to their users. Big blunder. The job isn’t done once you’ve acquired the user; your role simply shifts. Now you must delve deep into the user app data to figure out how to keep them engaged and using your app. To ensure user retention, you must constantly upgrade and improve the app based on the experiences and opinions of your users.
Now let’s go through a step-by-step guide to integrating analytics in your Shopify Mobile App.
I. For Users
To integrate analytics into your Shopify mobile app, you need to share the Property ID from the Google Analytics dashboard.
Step 1- Visit the following link https://analytics.google.com/analytics and log in with your registered Google account.
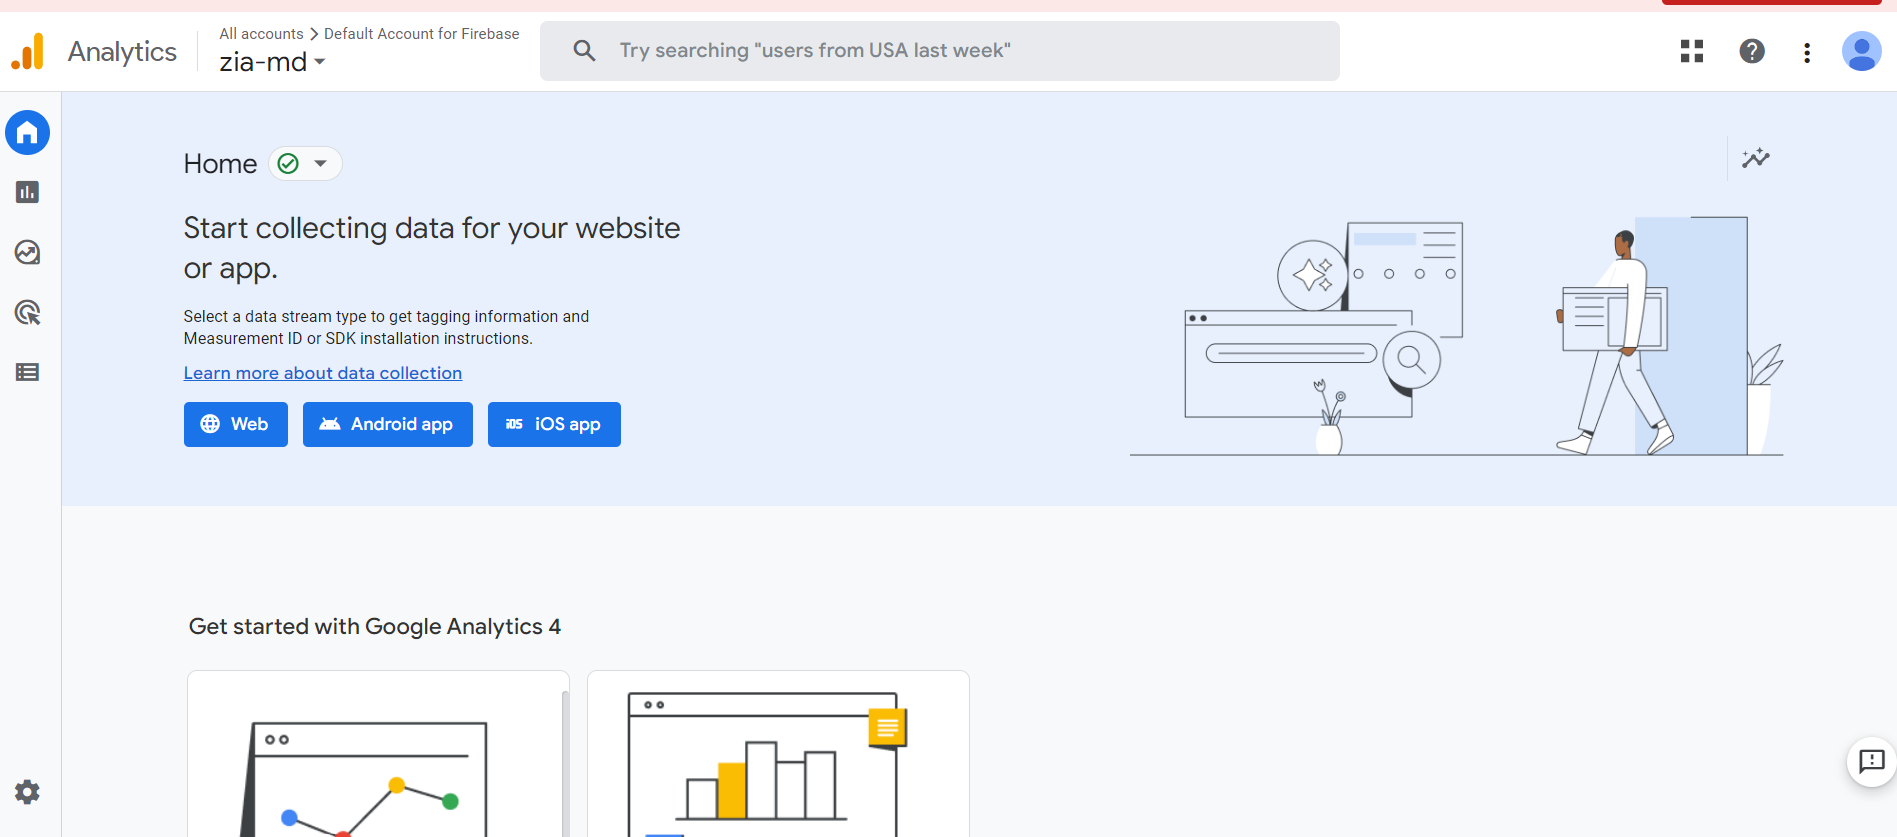
Step 2- After logging into your analytics, click on the ‘Admin’ button from the left Menu Bar (bottom left corner) from the analytics dashboard.
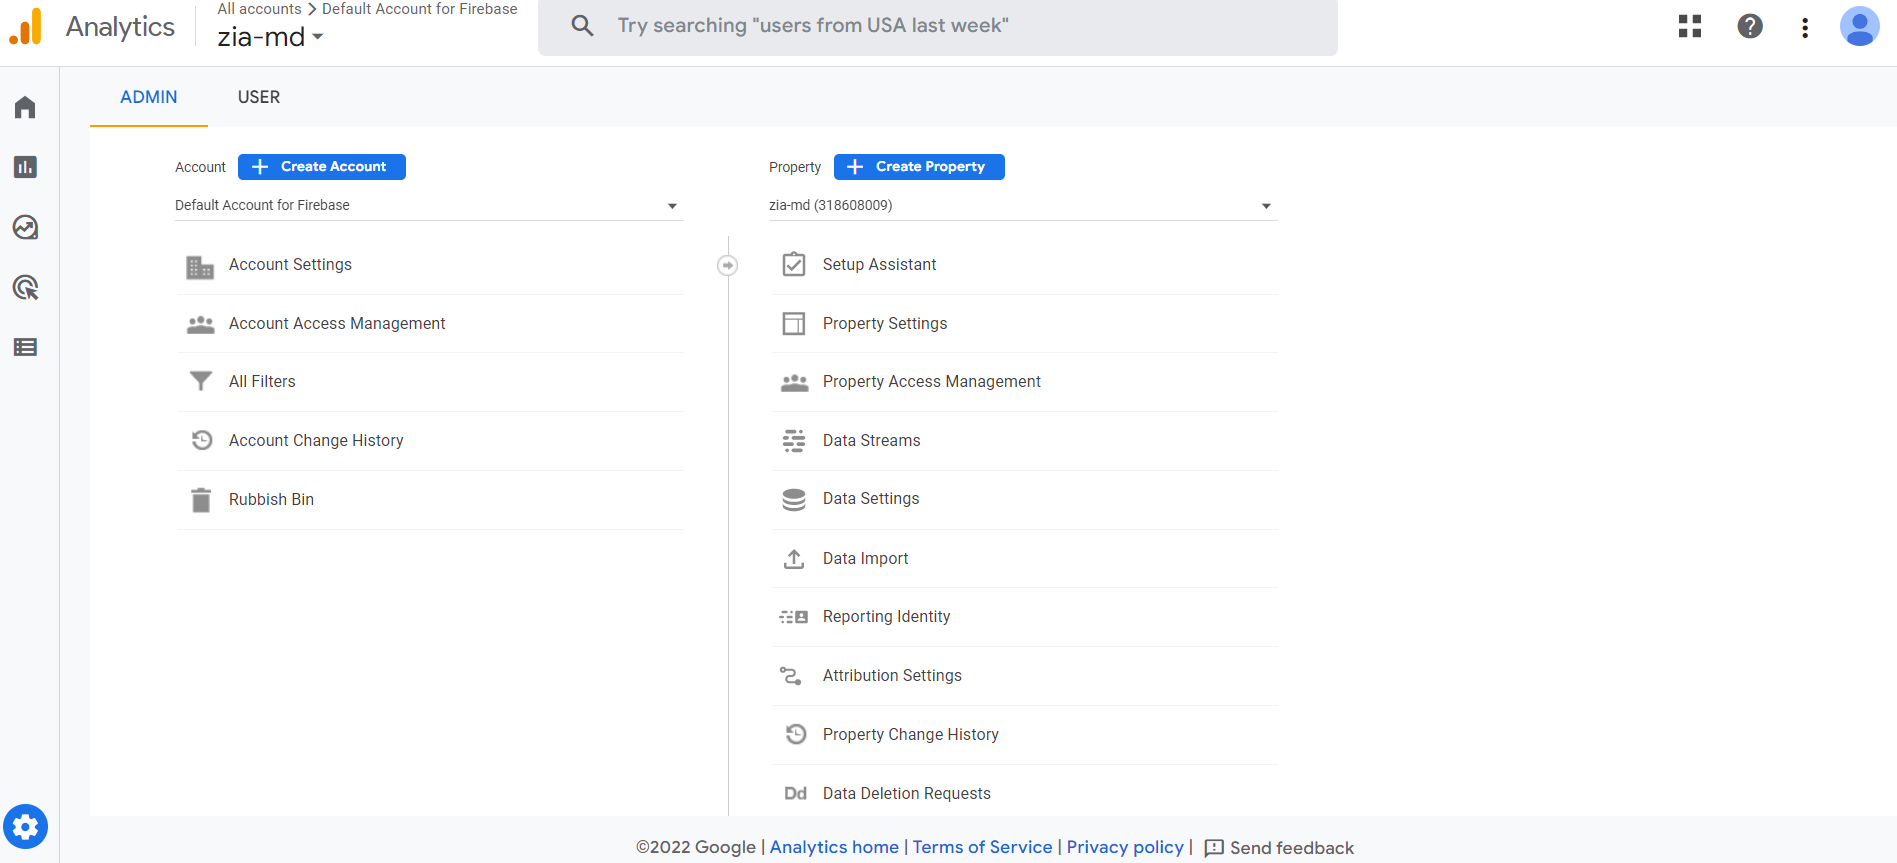
Here, you will find the property ID.
Step 3- Copy this property ID (should be in number, not the one started with Alphabet) and share it with us so that we can enable the analytics in your Shopify mobile app.
II. Go Through These Steps If You Are A Developer
Step 1- If you are a developer and want to give access to the dashboard in the Shopify App visit the link below and select the project on which you want to work.
https://console.cloud.google.com/getting-started
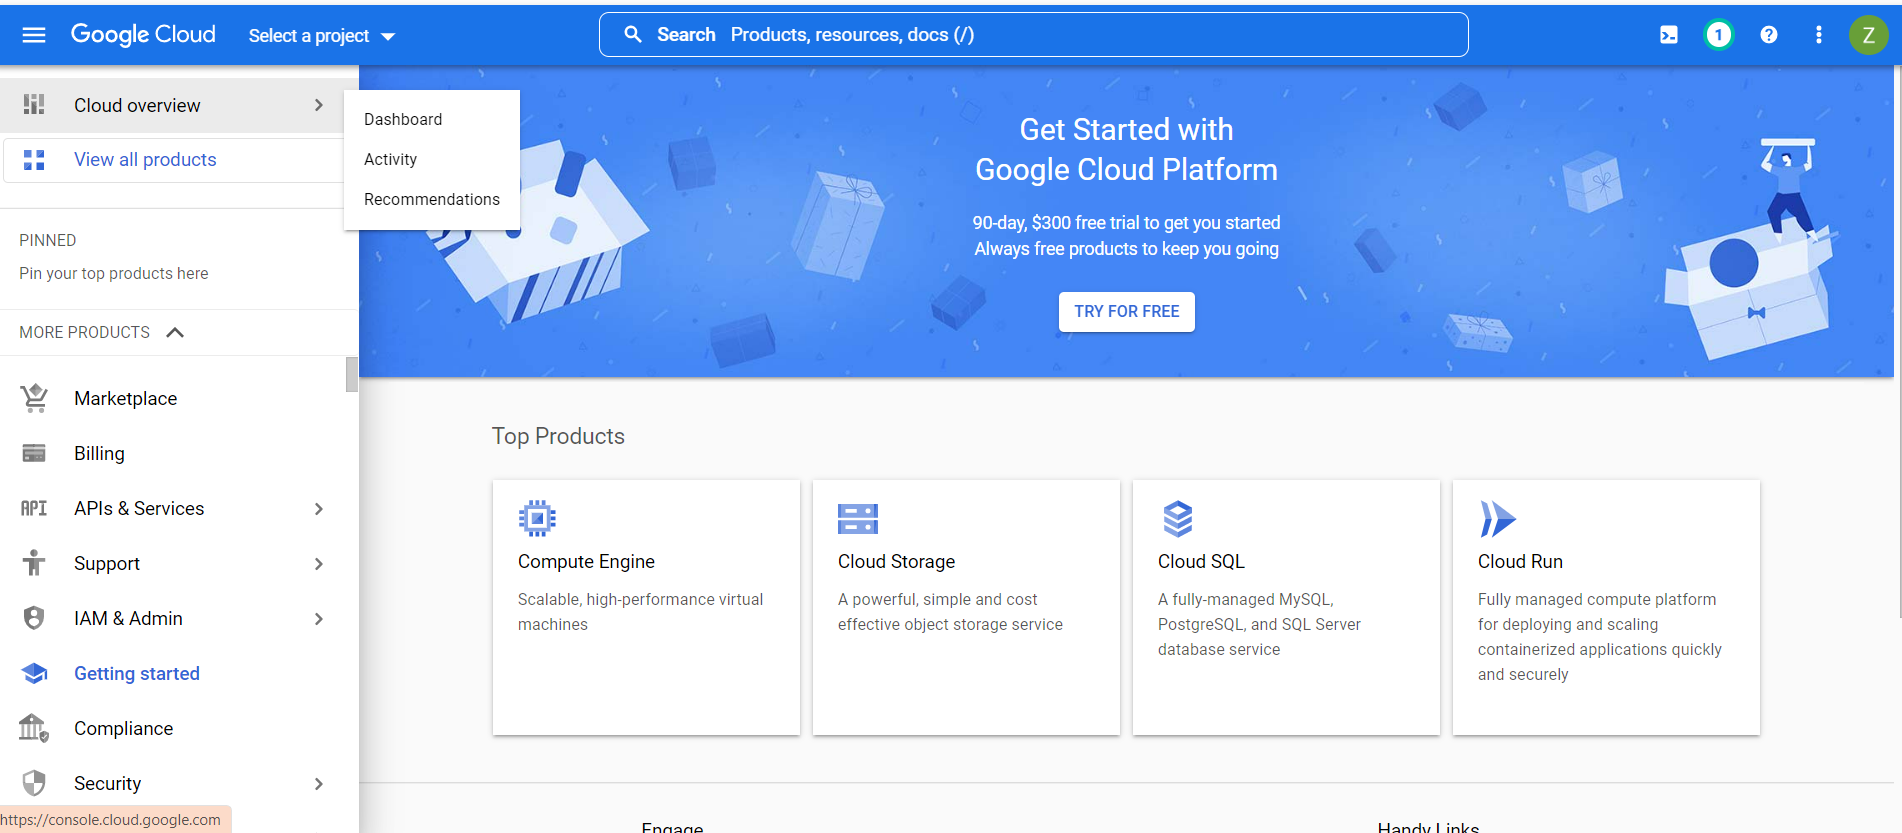
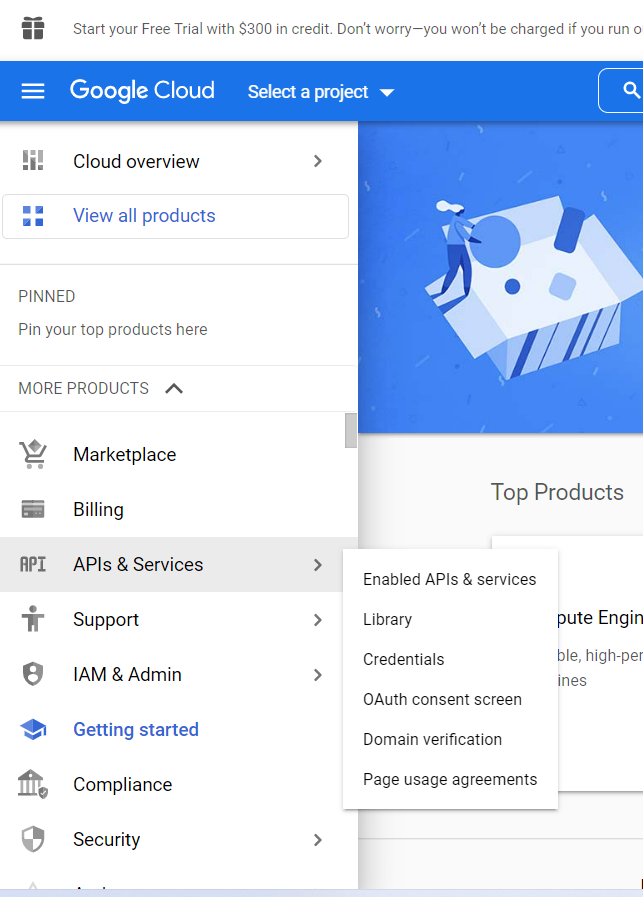
Step 2- After that click on the ‘APIs & Services and then click ‘Enabled APIs & Services.
Step 3- Then search for ‘Google analytics data API’ from the search bar.
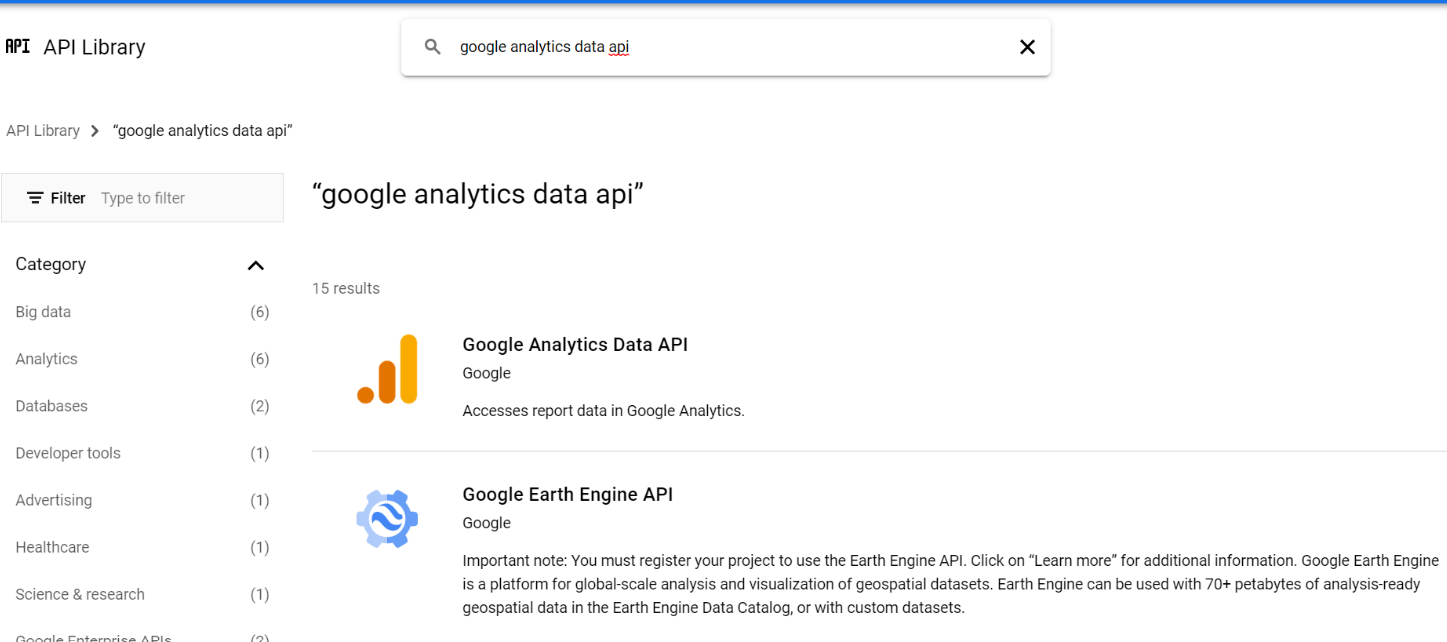
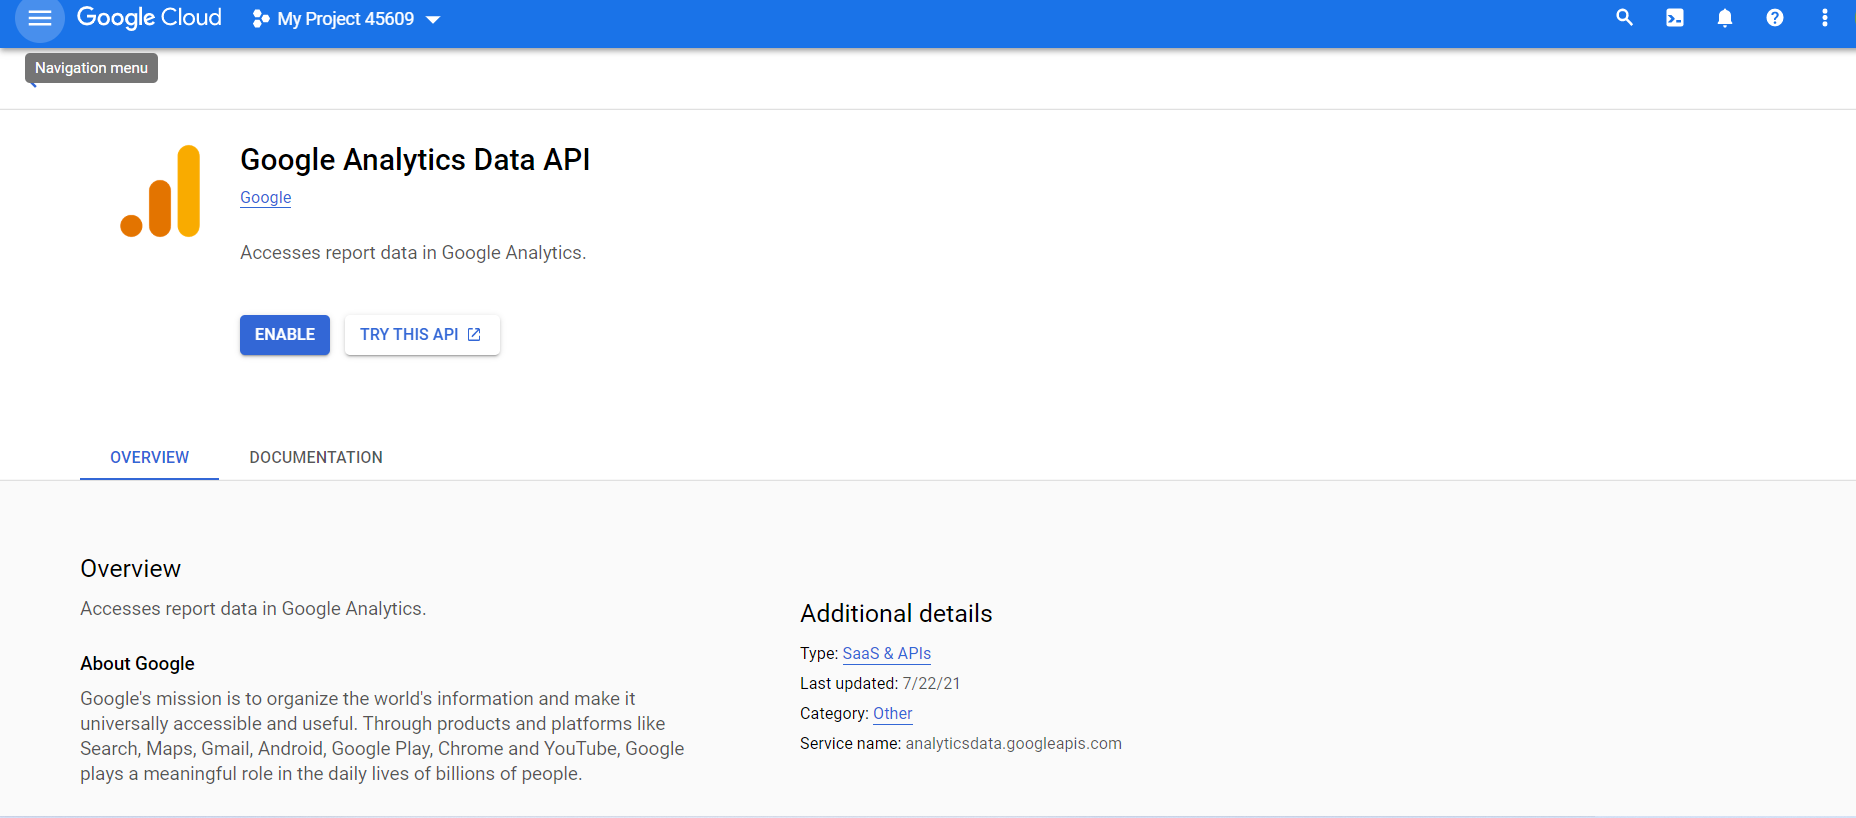
Step 4- Then click on the enable button to activate the ‘Google Analytics Data API’.
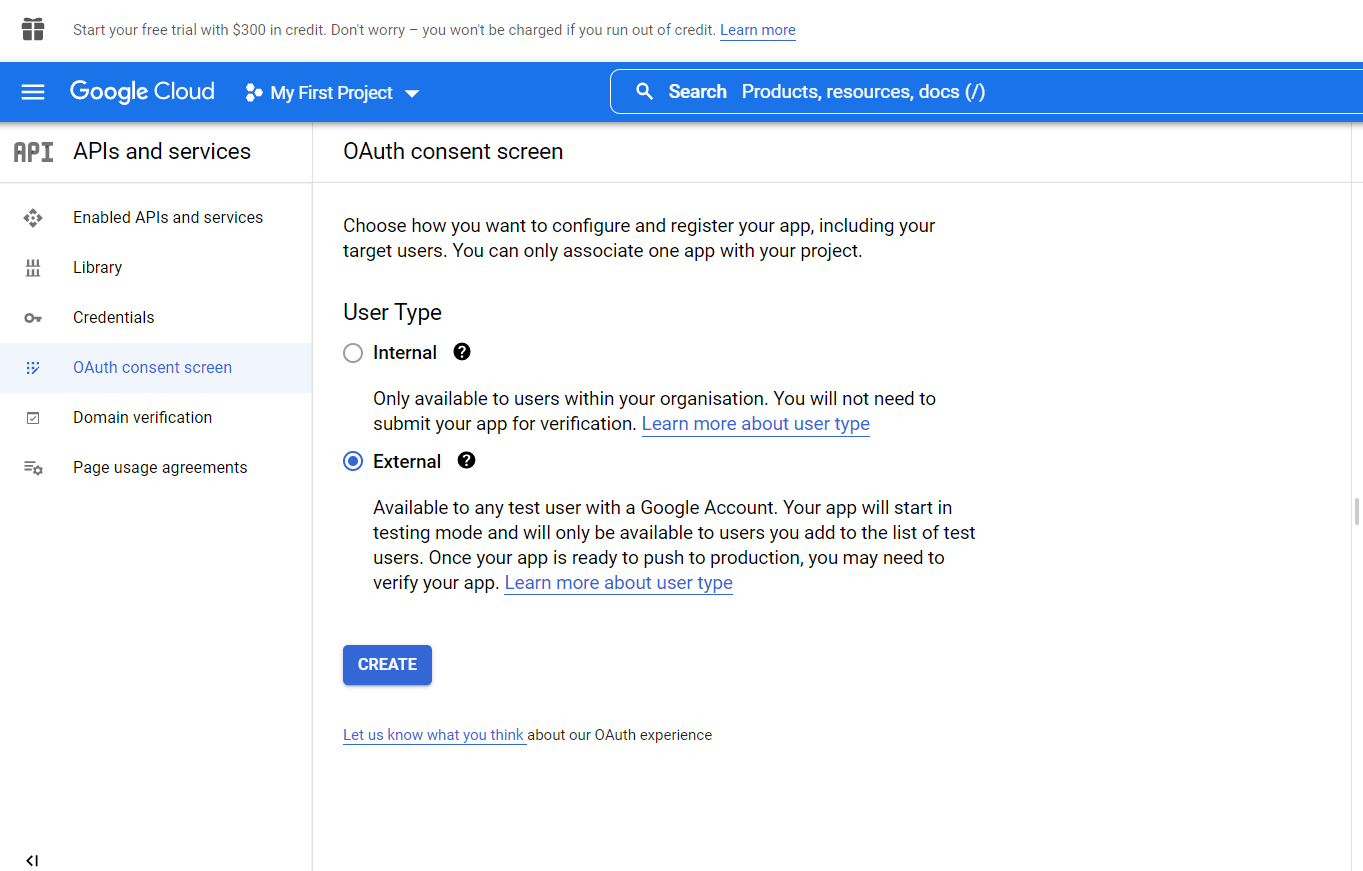
Step 5- Click on the OAuth consent screen.
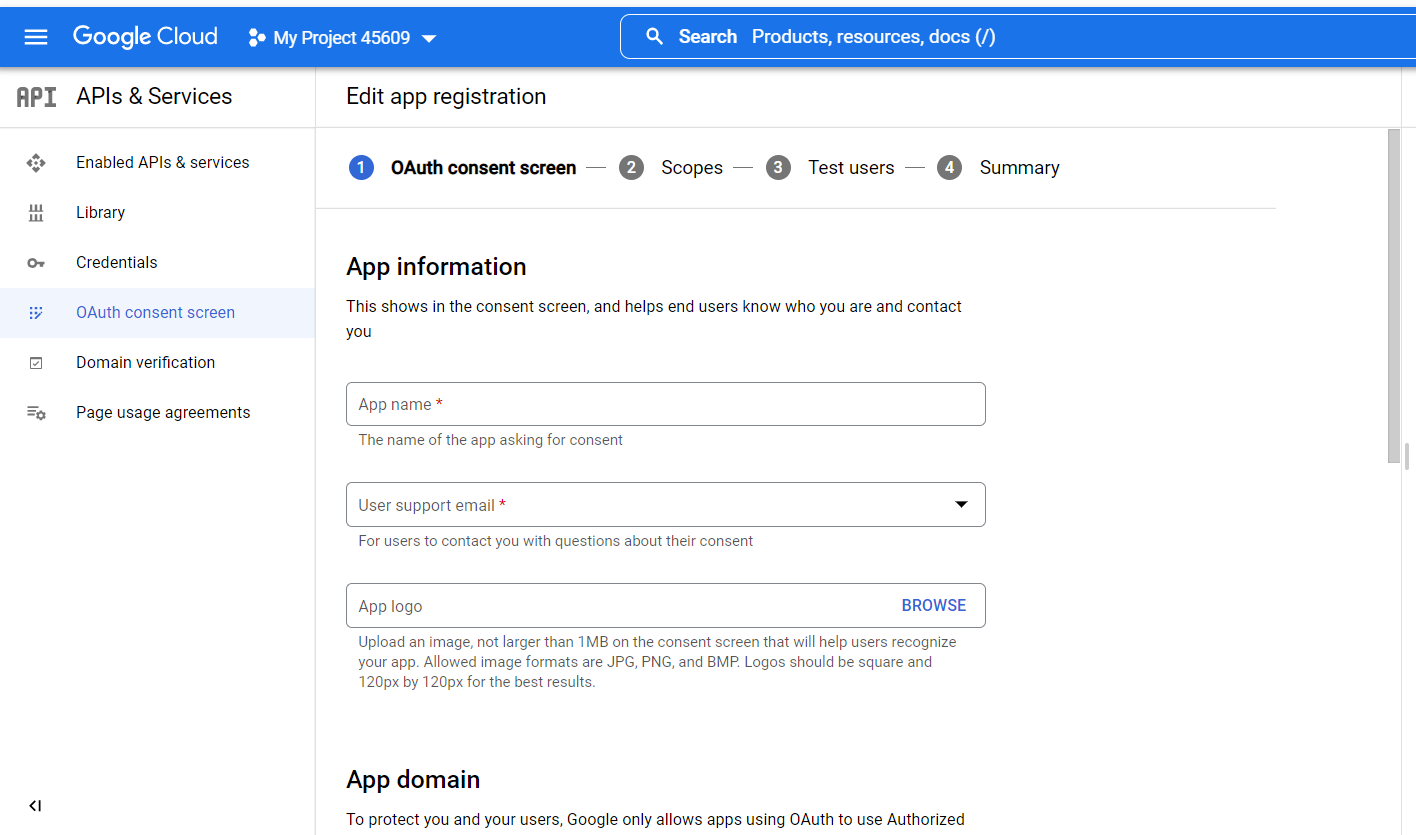
Step 7- Here you need to enter the required app information and then click on the ‘activate’ button.
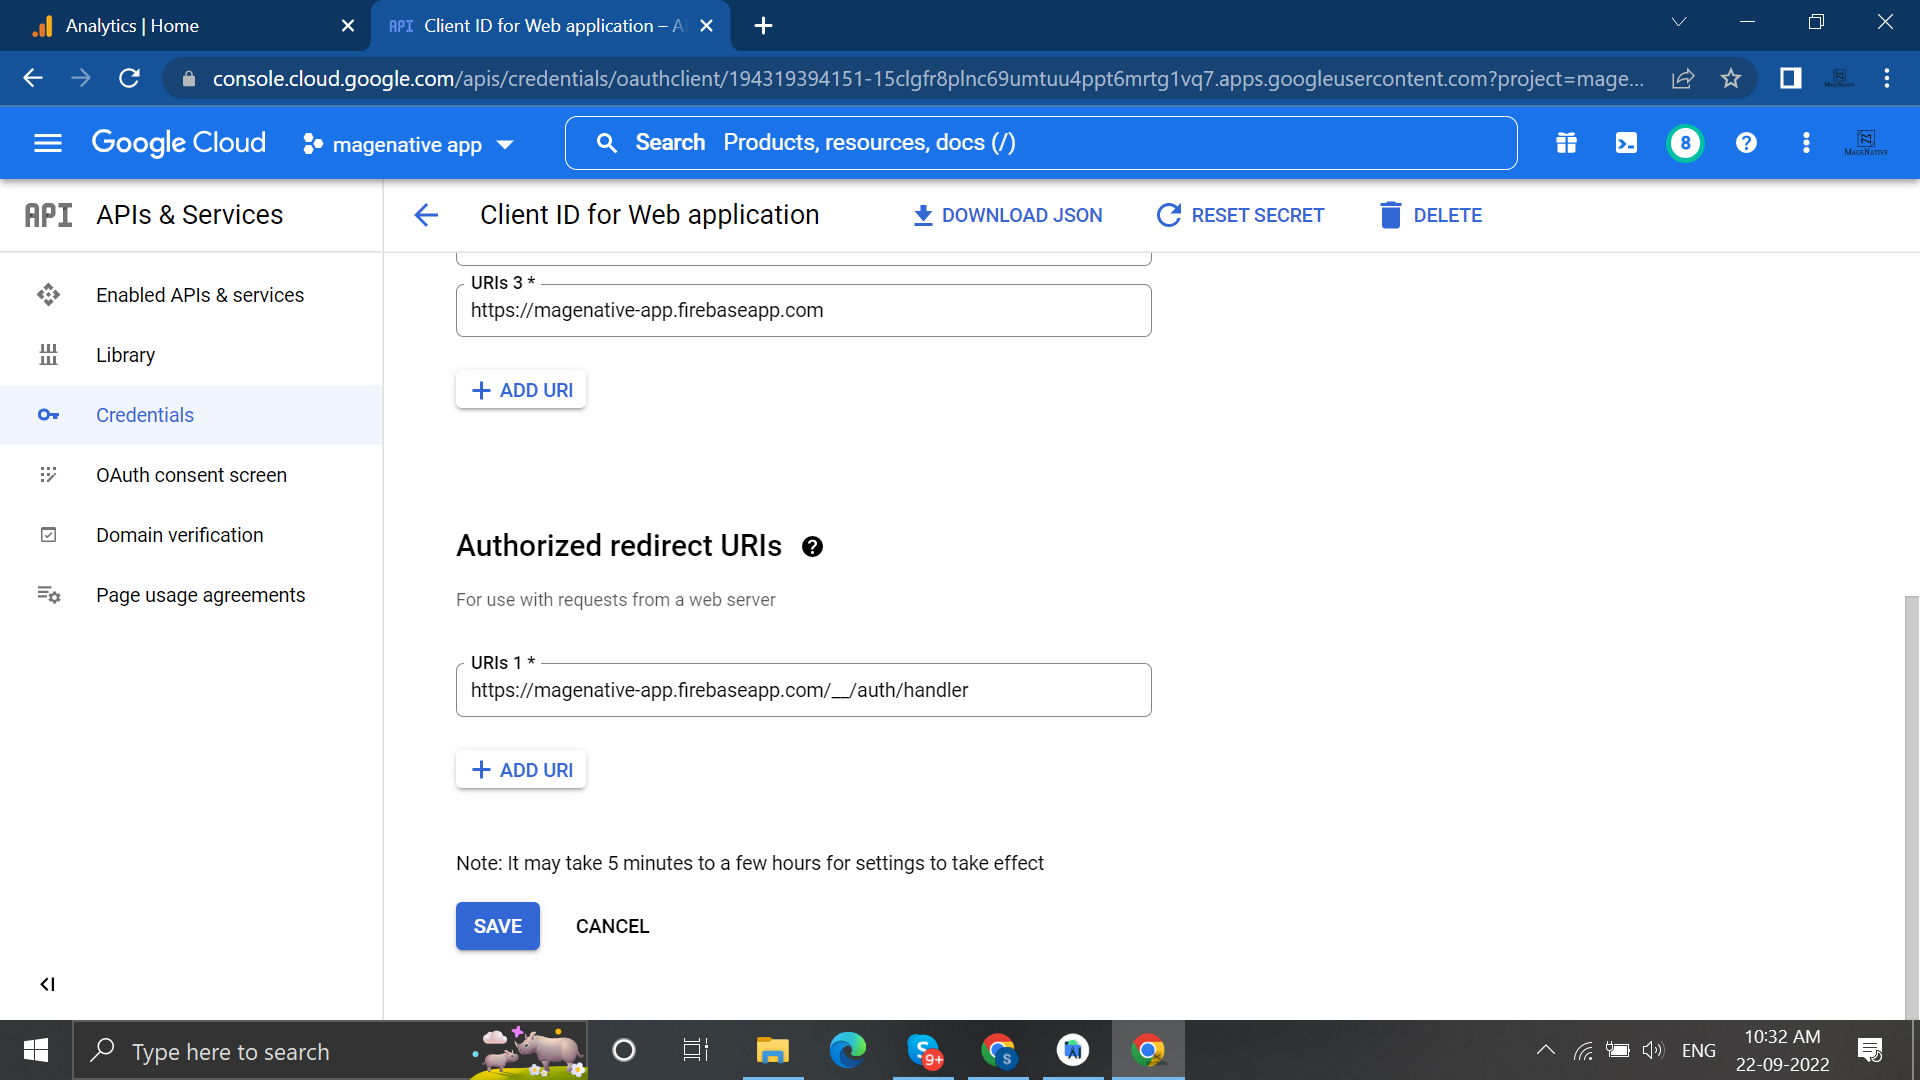
Step 8- Once these steps are done you need to navigate to the credential section once OAuth is configured and select the “Web client” option.
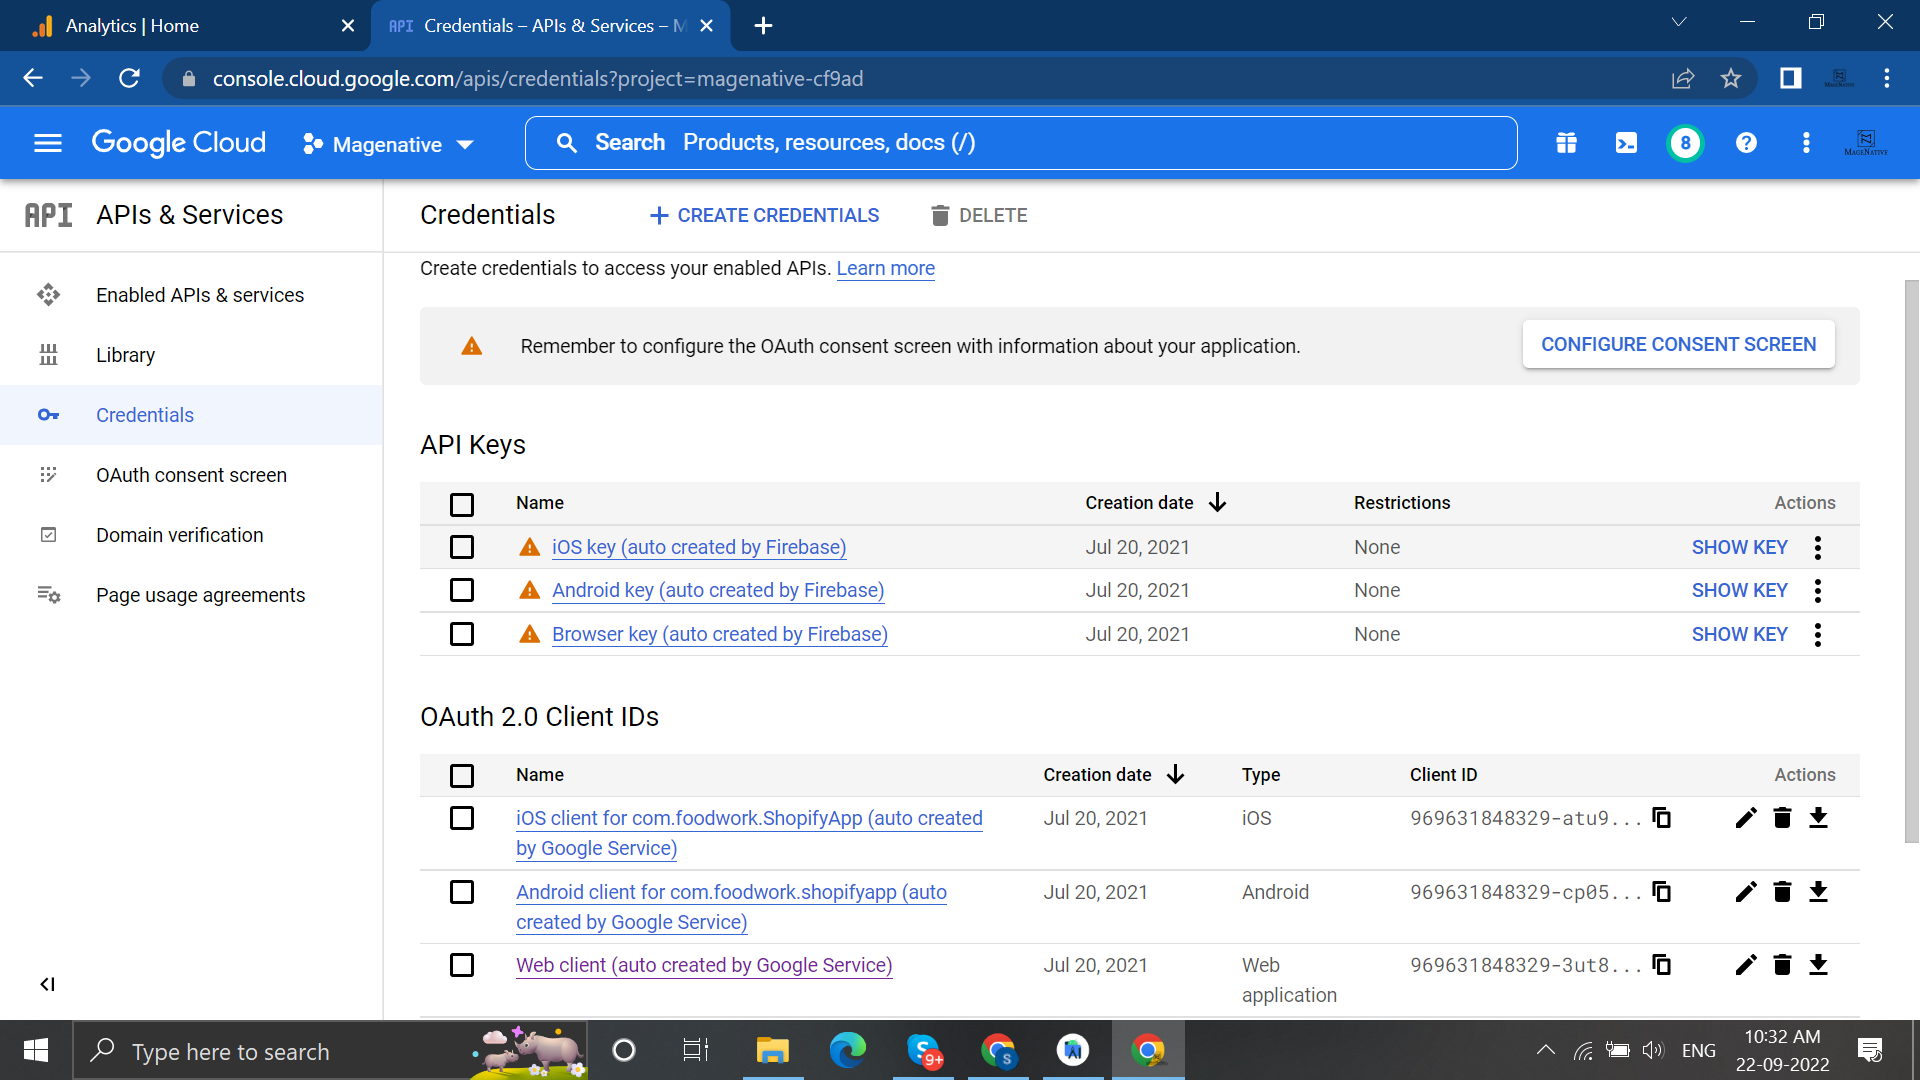
Step 9- On the Right side, you will find the Client Id and Client Secret which need to be filled on the Shopify client panel.
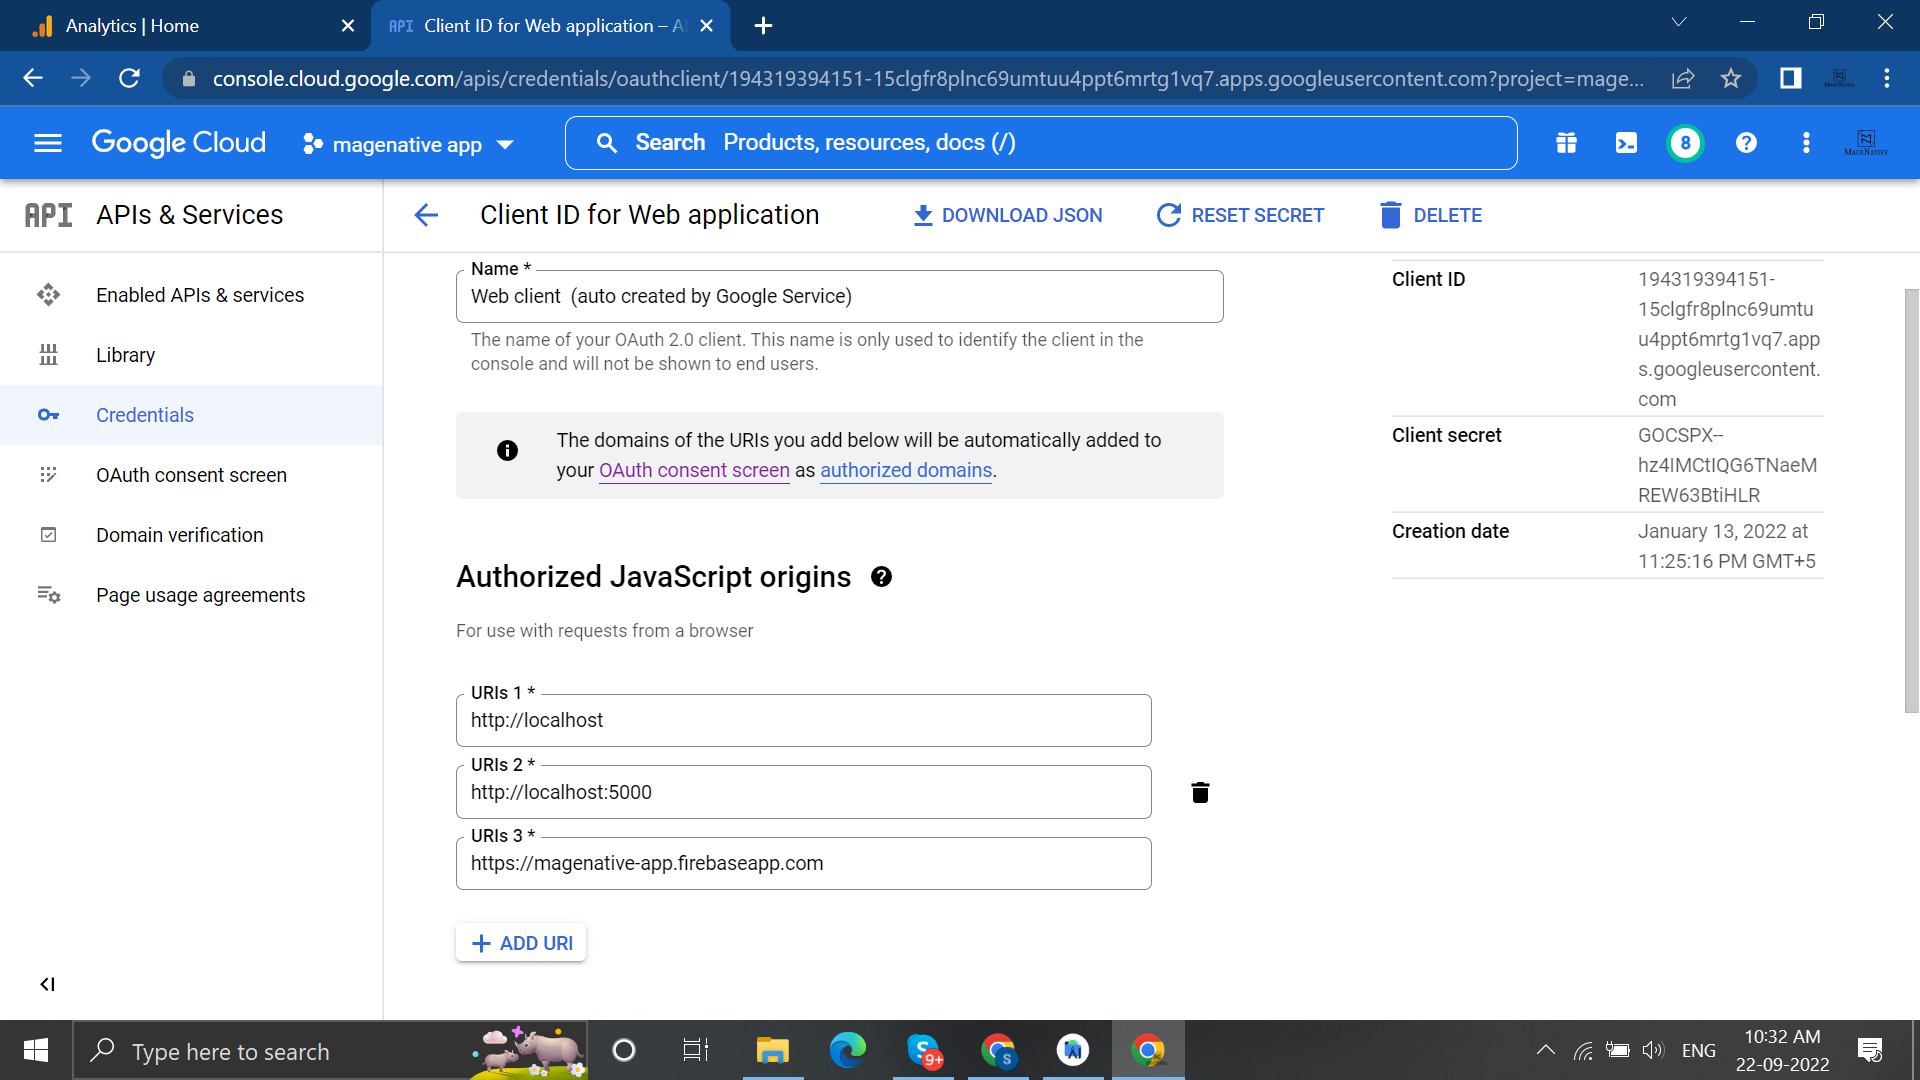
Step 10- AuthRedirect URLs are to be filled here after that all is done from the developer ends.
Step 11- Then, finally, ask your clients to Google authenticate on their MageNative panel.
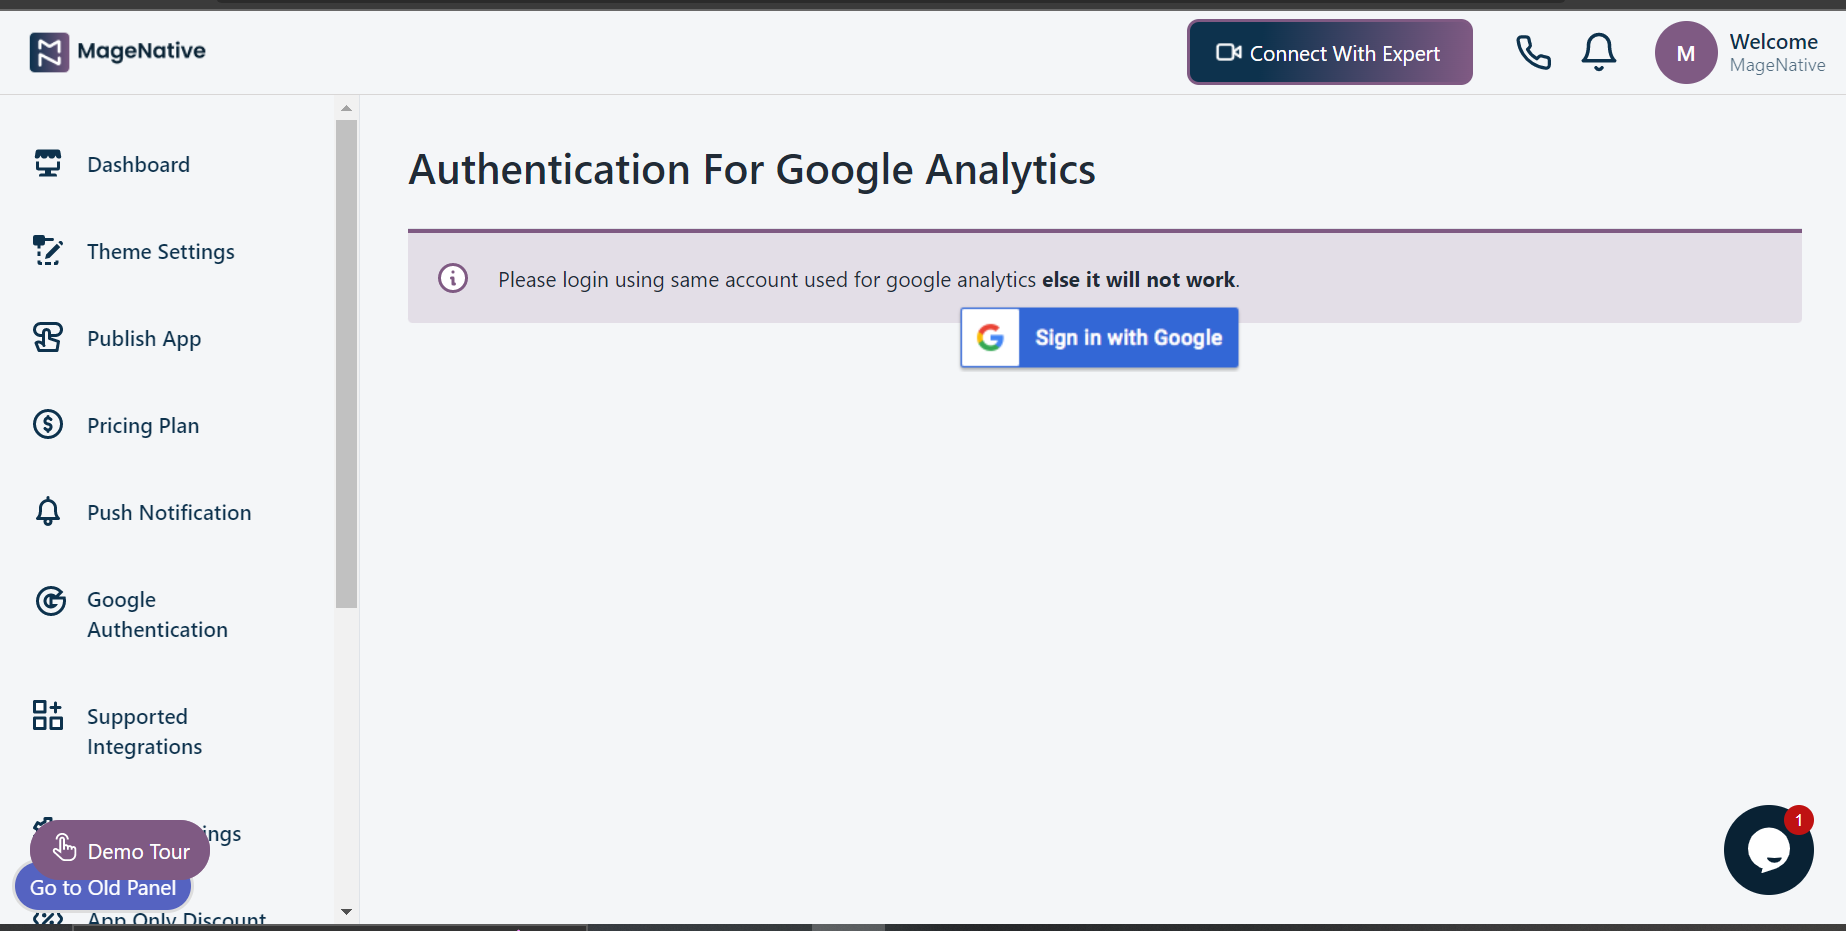
That’s it! you have successfully activated the analytics dashboard in your mobile app.
If you still have doubts or need any help, connect us now.


