

Appstle℠ Subscriptions App


Subscription
Appstle℠ Subscriptions App
MageNative Mobile App Builder has recently integrated with the Appstle subscription app to enable merchants to create a subscription campaign on its products efficiently.
Appstle Subscriptions is a subscription management solution for the Shopify store. It enables businesses to sell regular and prepaid subscriptions, build-a-box, and free trial alternatives. The app’s loyalty features provide users access to tiered discounts, personalized delivery, and gifting opportunities.
Let’s go through the step-by-step guide on how to enable an appstle subscription in your MageNative app.
Step 1- From the Dashboard of your MageNative app go to the ‘Supported Integrations’ section.
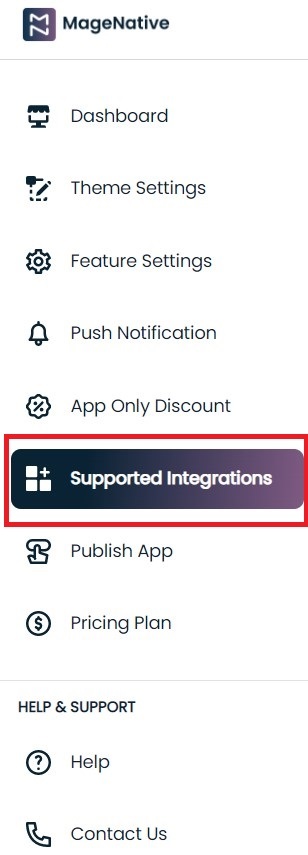
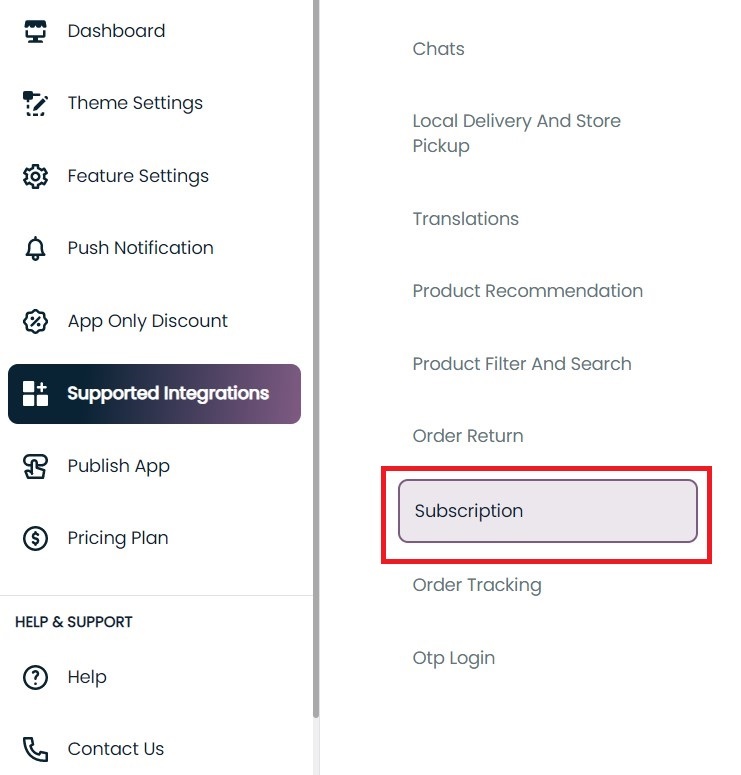
Step 2- Following the “Supported Integration” link, you’ll easily find the “Appstle Subscriptions” under the subscription category.
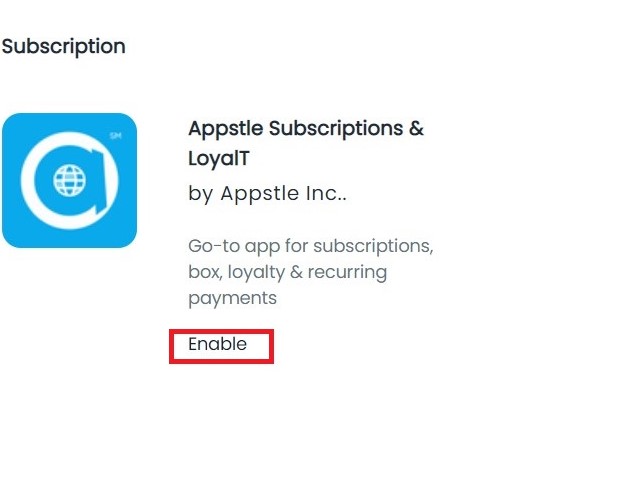
Step 3- After that, click the enable button corresponding to it.
Step 4- Once you have installed Appstle on your Shopify panel, you can create a subscription campaign for selected products.
- Search for the product you want to create a subscription campaign.
- Select the product on which you want to create a subscription.
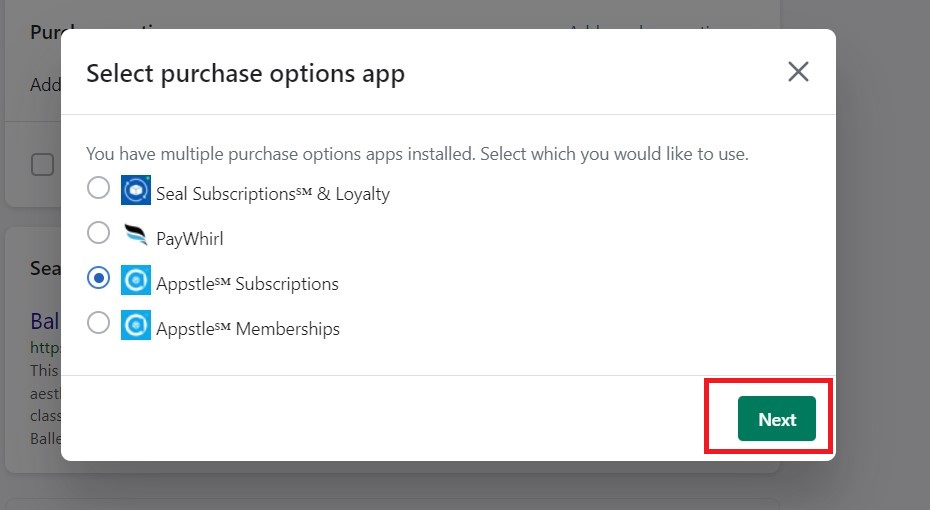
Step 5- Go to the “Add purchase option” then “create new option”
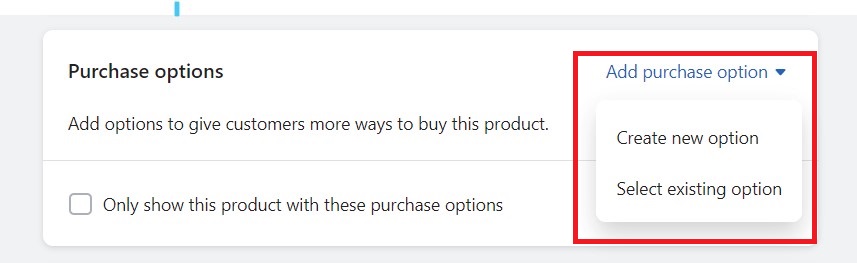
Step 6- After this, select the Appstle subscription and click on the next button to proceed.
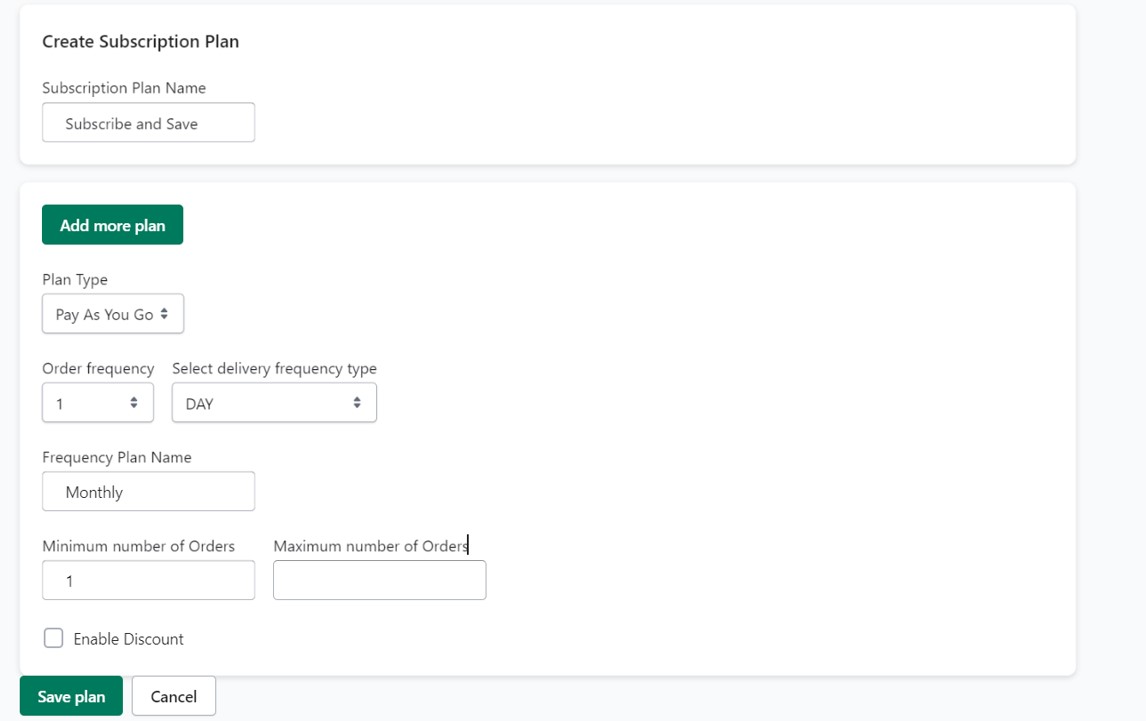
Step 7- Create a subscription plan
Then you need to enter the following details for the products you want to include in your subscription plan.
1- Subscription Plan Name.
2- Plan type.
3- Order frequency.
4- Minimum/Maximum number of orders.
Step 8 – Also, you can enable a discount on your subscription plan:
1-Click on the checkbox “Enable Discount”.
2- Enter the discount amount.
3- Select the discount type from the dropdown.

Step 9-Also, if you want to change the discount offer after a certain period, mark the checkbox “Change discount after”. And fill following details
1- “After Cycle” duration.
2- Number of discounted amount to offer.
3- Discount type i.e. “Percent/Amount”.
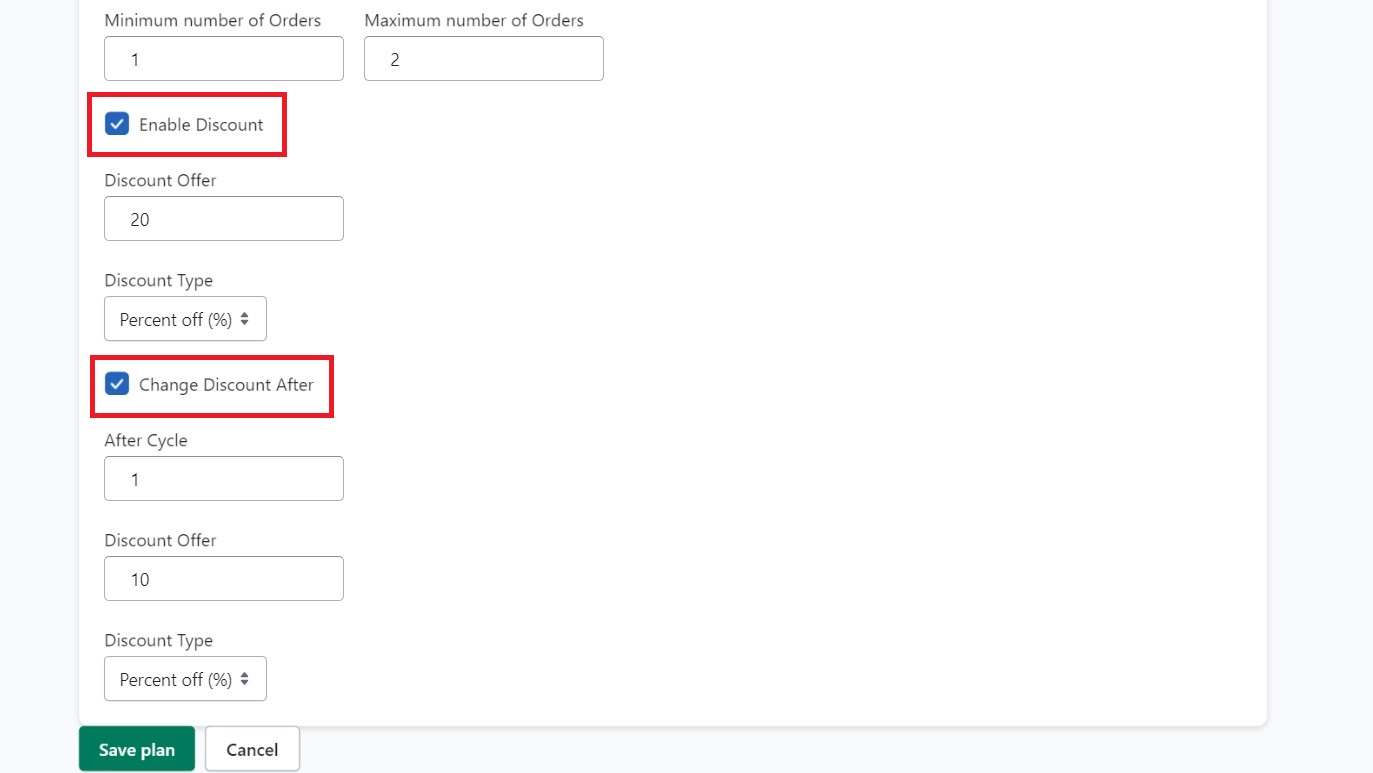
Once you filled in all the details, click on the “Save Plan” button and proceed.
Once you have filled in all the required information and set up your membership campaign, it will reflect in your mobile application.

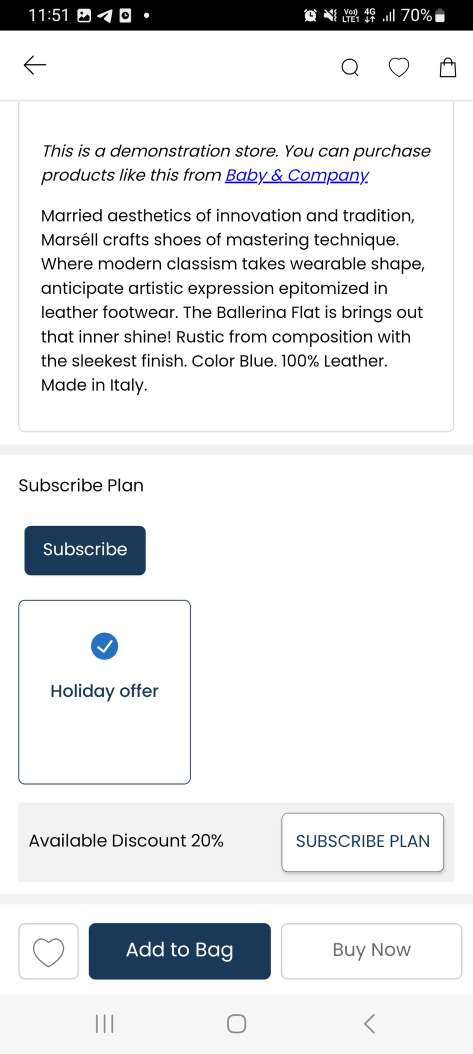
You’re all set! You can now make use of Subscription features within your Shopify mobile app to improve user experience.🤩


")